How to install a new theme for your website
This article describes the steps required for a WordPress theme installation.
NOTE: If you just installed WordPress, follow the steps provided in this article. However, if you have a live site, you may want to make a backup of the site, since a theme switch can alter certain functionality.
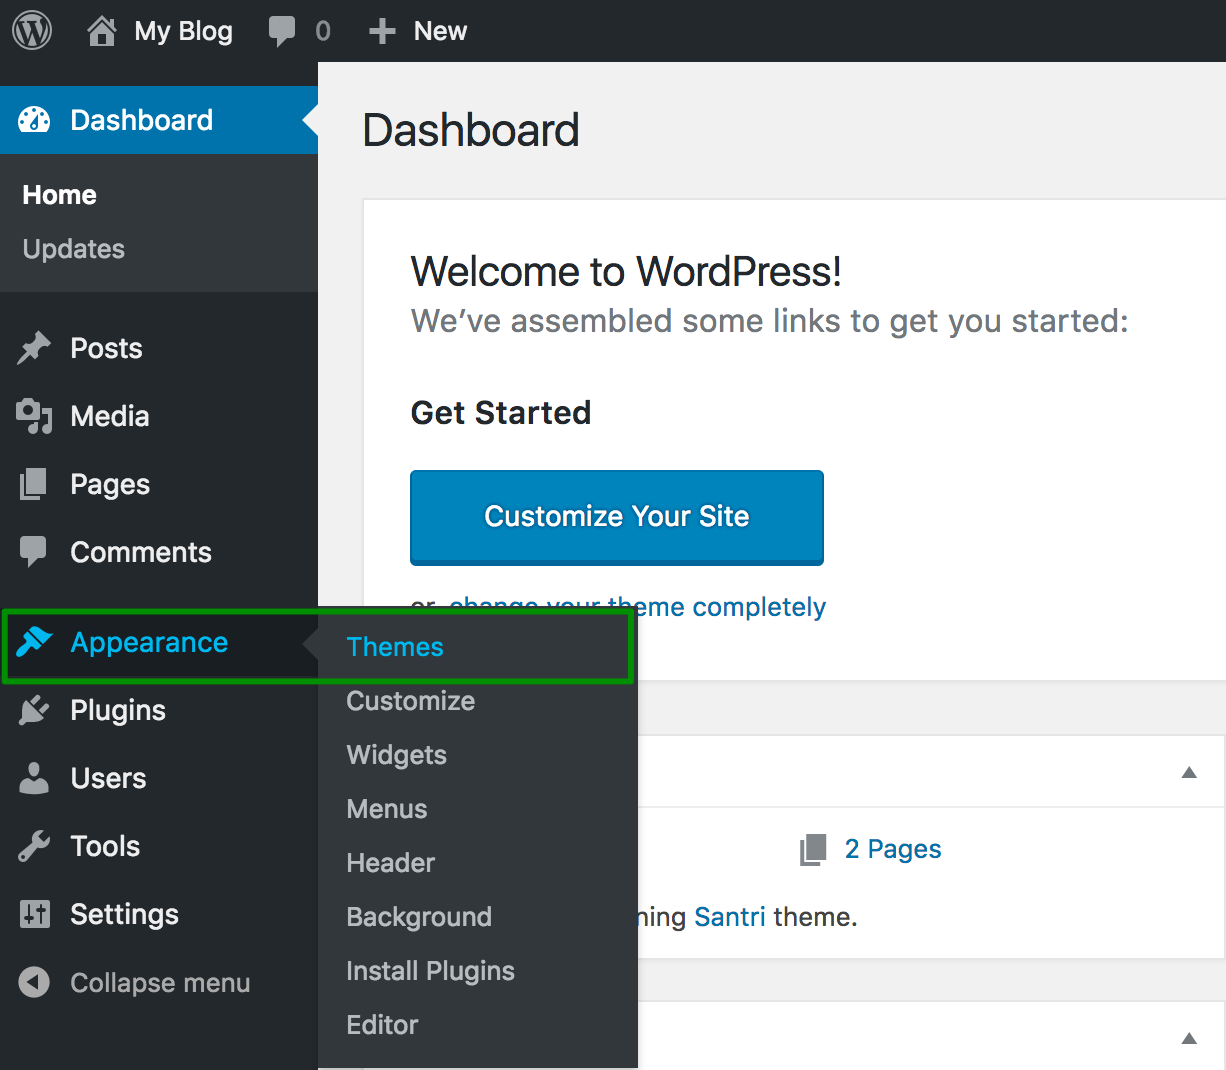
1. From within your WordPress Dashboard, navigate to the Appearance menu and click Themes:
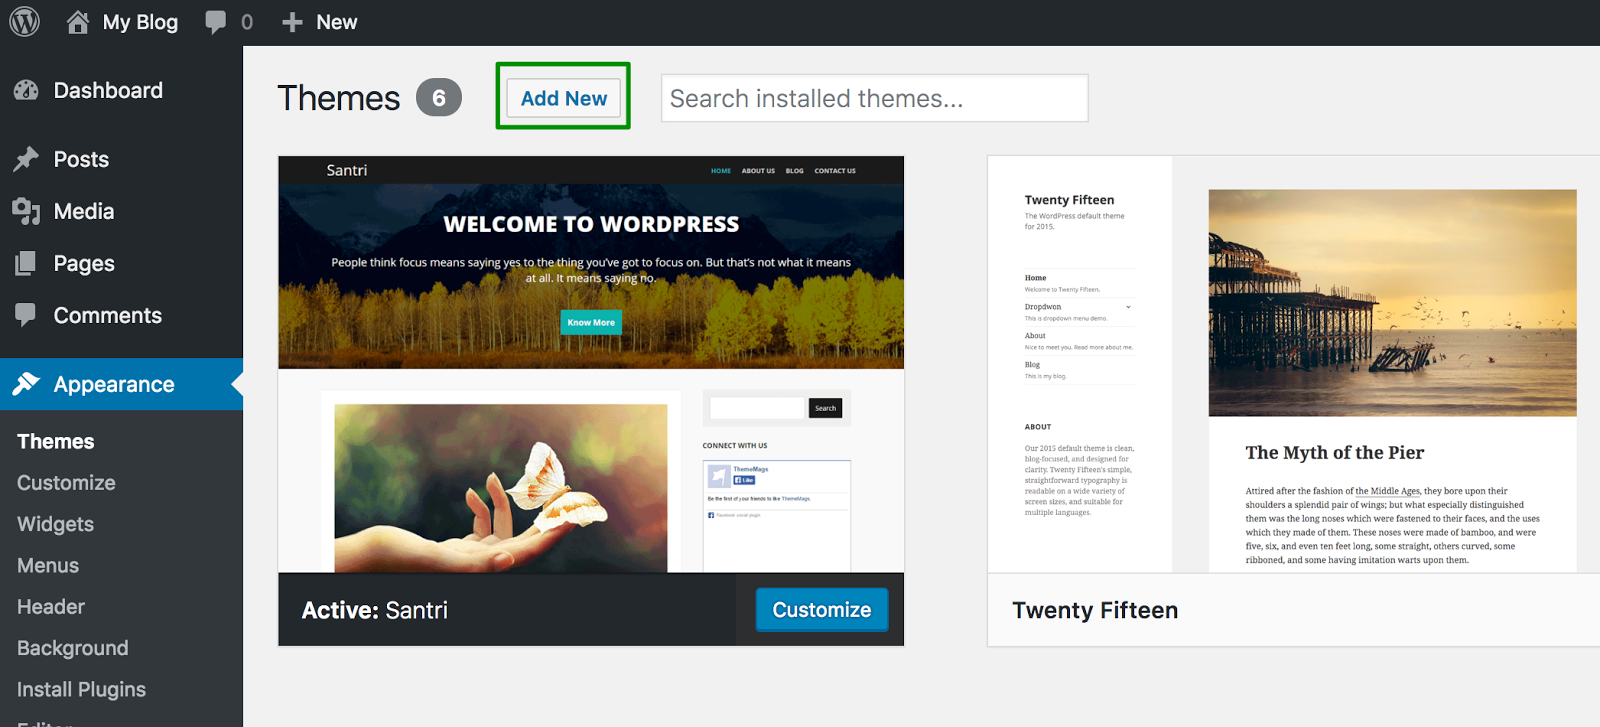
2. On the next page, you can install a new theme by using the Add New option:
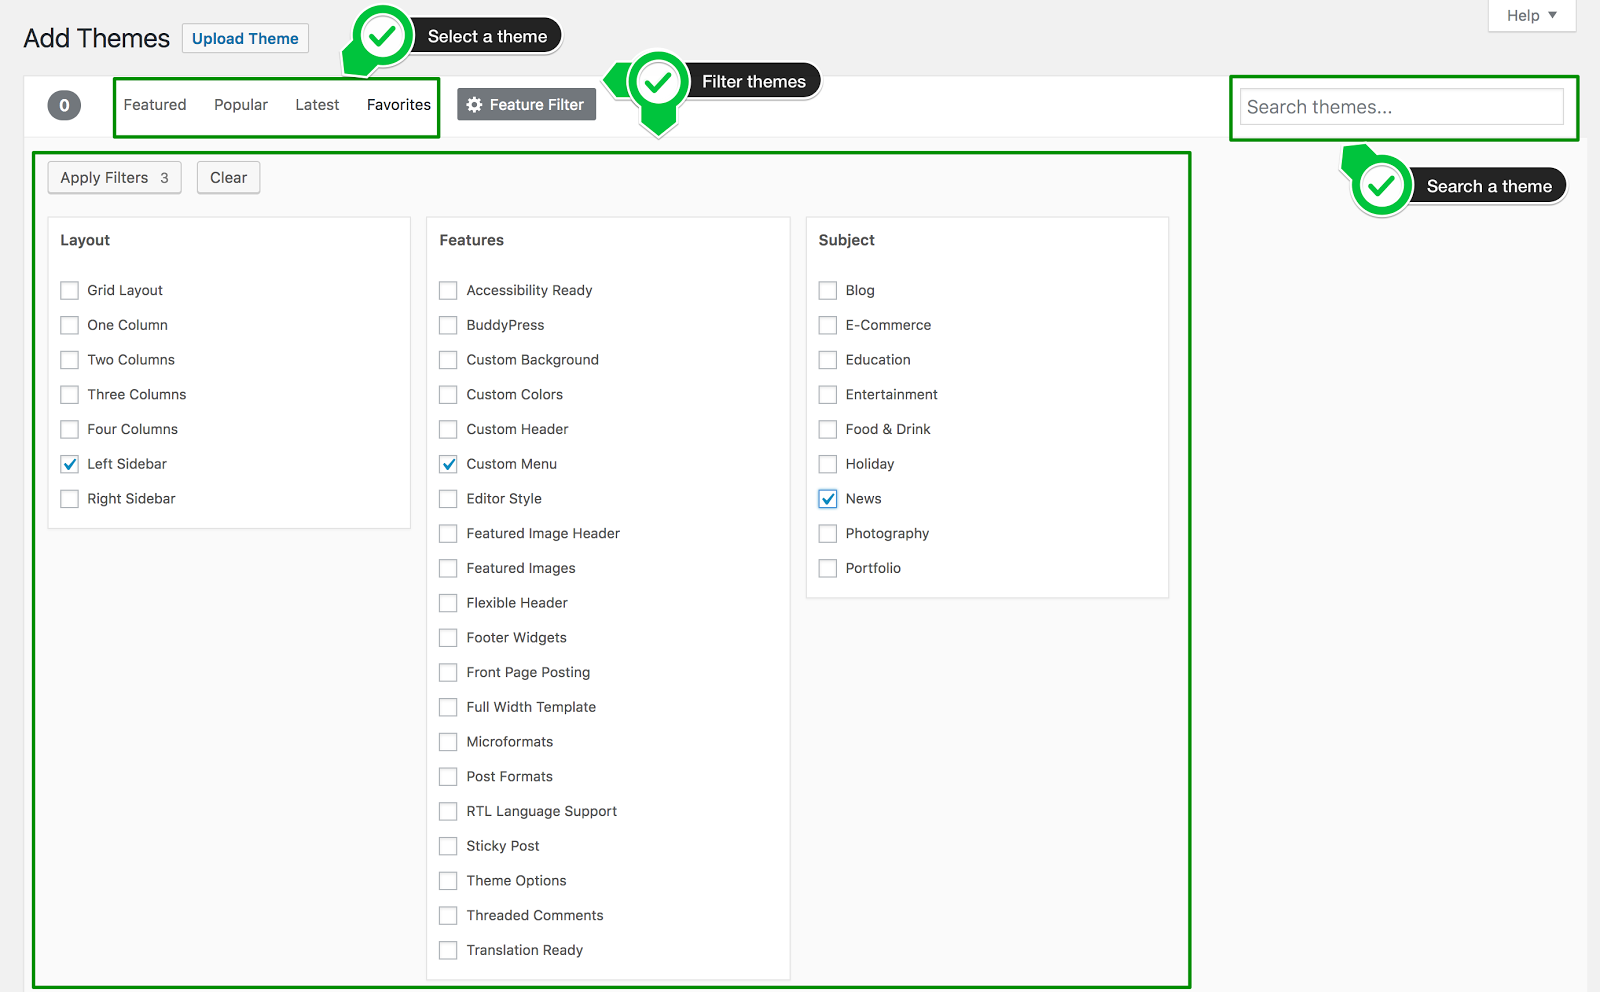
You can select a theme from the Featured, Popular, Latest, or Favorites, search all themes using the built-in Search option, or filter themes to your specifications using the Feature Filter option:
NOTE: While there are thousands of freely available third-party themes, some may require payment.
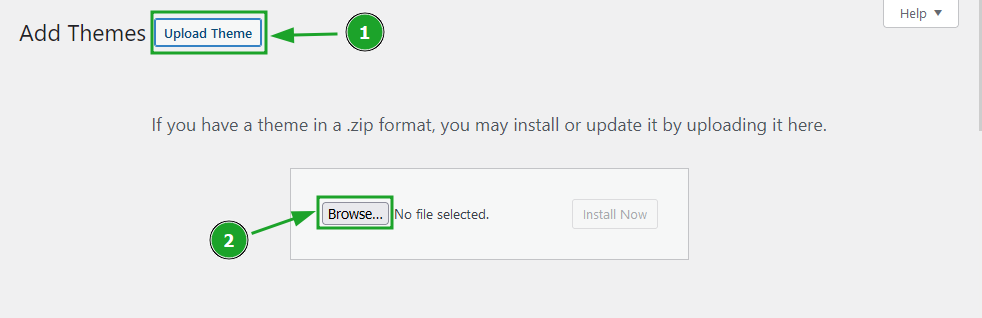
As an alternative, you can upload a .zip format of a new theme to your WordPress dashboard by using the Add New option >> Upload Theme >> Browse:
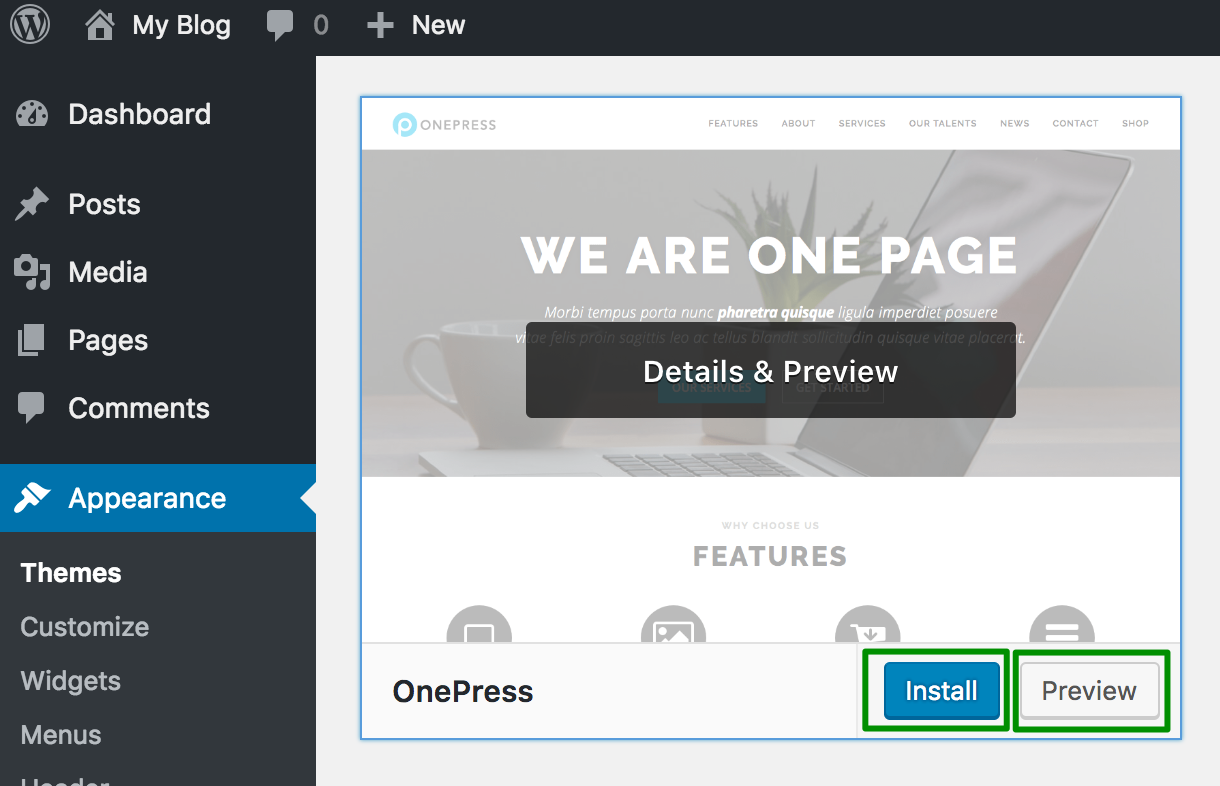
3. You may preview a theme by selecting the Preview option. To install a theme, click Install:
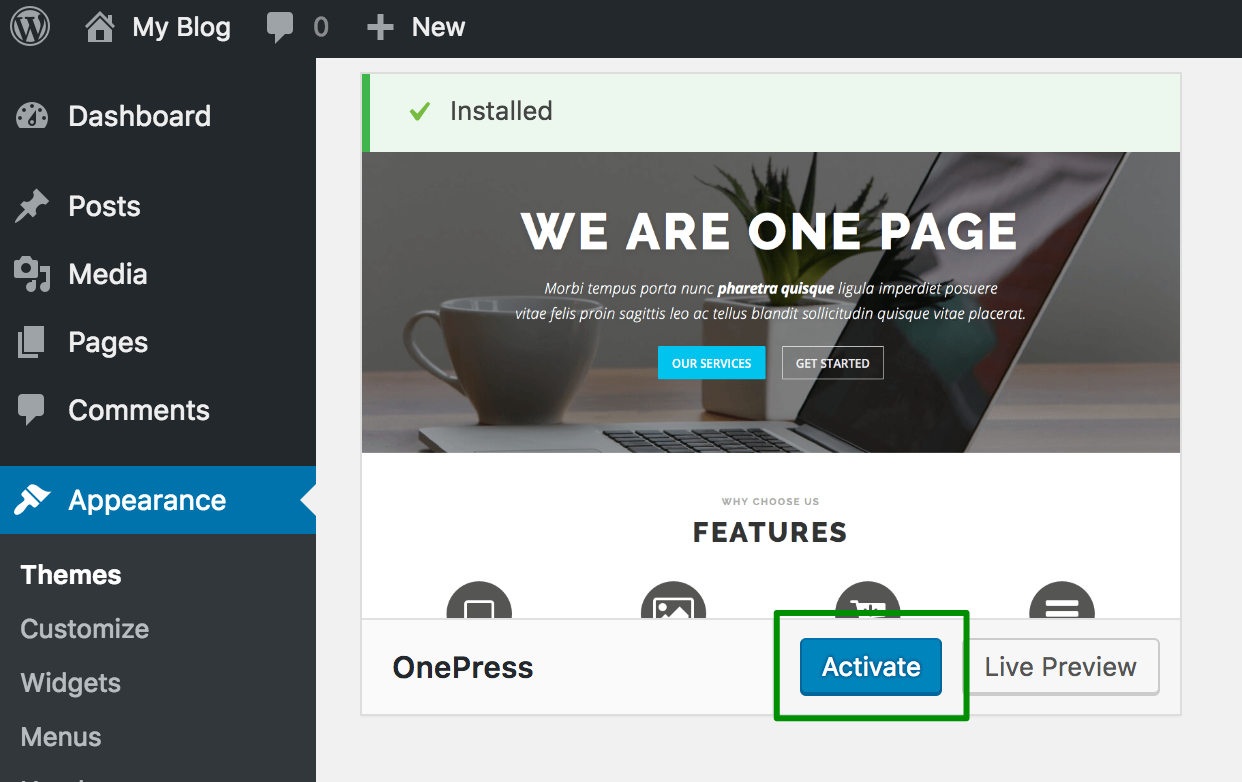
4. Once a new theme is installed, you will need to activate it by clicking Activate:
NOTE: The archive of the theme should be downloaded to your computer beforehand.
1. Access your website content via an SFTP by using the article.
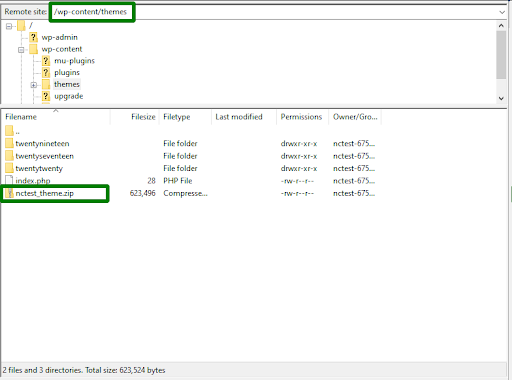
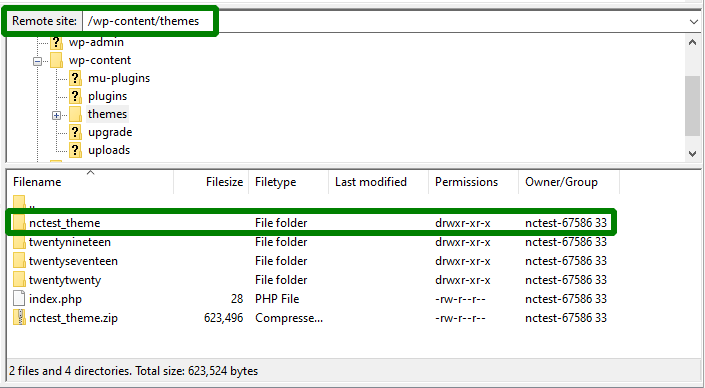
2. Navigate to the wp-content/themes folder and upload the archive of your theme to the folder:
3. Extract the archive and make sure that the folder is located in wp-content/themes folder.
4. Access your WordPress Admin Dashboard and then navigate to the Appearance >> Themes menu. Once all actions are completed, you will see the new theme that’s ready for activation.
NOTE: Unfortunately, it isn’t possible to extract files, by default, in some FTP clients. In this case, you may do the following:
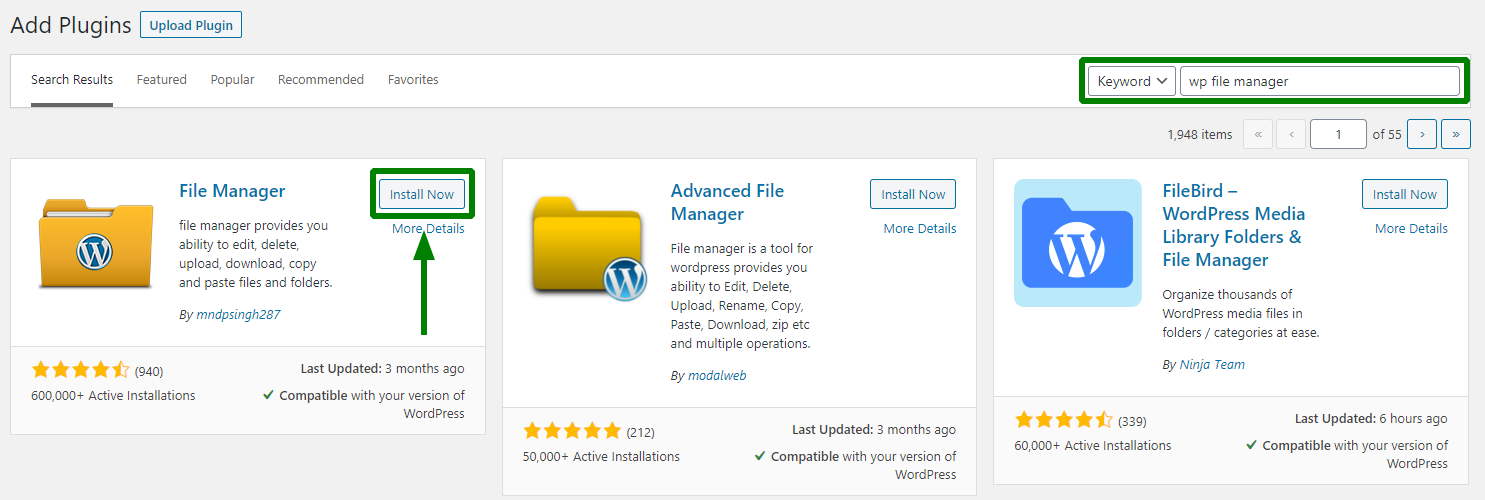
1. Log in to your WordPress Admin Dashboard and go to Plugins >> Add New. Then, search for “WP File Manager” and install it:

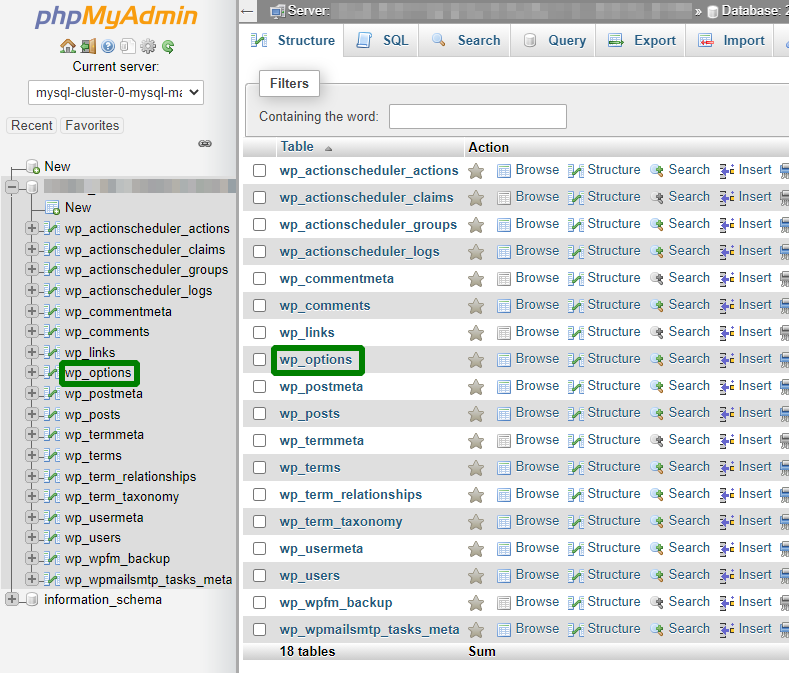
It’s also possible to switch WordPress themes via the website database. You may need to do this in case you don’t have access to your WordPress admin dashboard, e.g. your current theme is corrupted or hacked. So, to get access to your website, you’ll need to change your theme via the database.
1. Access your phpMyAdmin using this guide.
2. Locate the wp_options table:
3. Increase the Numbers of rows and look for templates and stylesheets related to the activated theme:
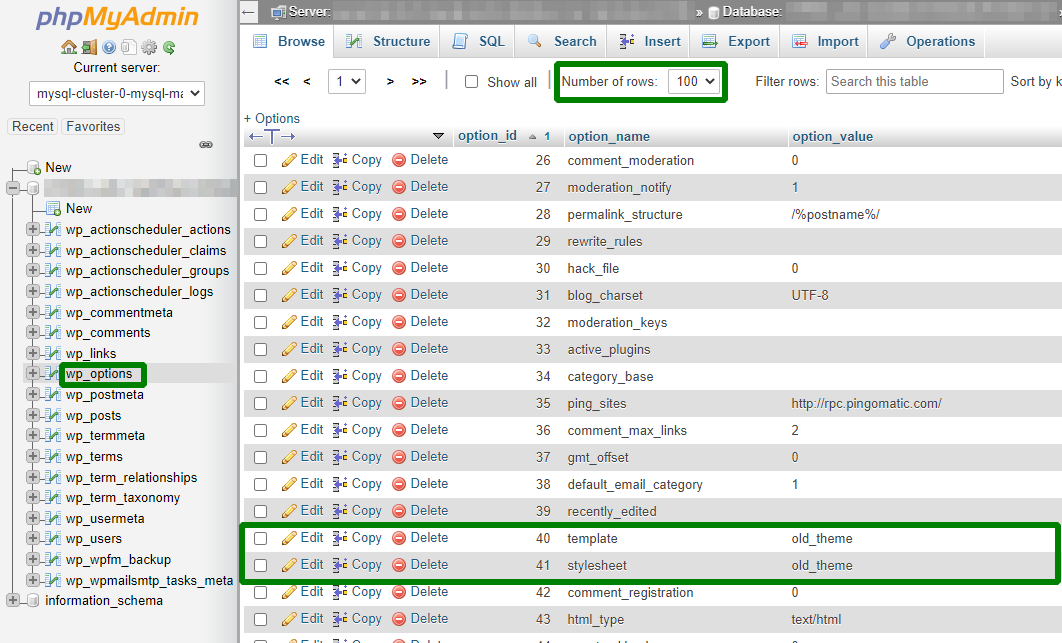
NOTE: Make sure that the theme you choose already exists in the wp-content/themes folder.

Once all the changes have been made, the new WordPress theme should be activated.
Now you can start customizing your newly installed theme.
Leave a Reply